How to Export iCloud Photos to an External Hard Drive on Mac
Step-by-step guide to exporting your entire iCloud photo library to an external hard drive on Mac — safely, completely, without filling up your internal storage.

Exporting iCloud photos to an external hard drive on Mac is the smartest way to own your photos outright — no subscription, no monthly fees, a permanent backup you control. But if your library is large, the standard approach fails fast: your Mac fills up before the export finishes.
Here's the right way to do it, step by step.
What You Need Before You Start
- A Mac running macOS 14 (Sonoma) or later
- An external hard drive or SSD with at least as much free space as your iCloud library (check Settings → [Your Name] → iCloud → Manage Storage)
- A stable Wi-Fi connection
- Time — large libraries take hours to export
For choosing a drive, see our guide to the best external SSDs for Mac photo backup in 2026. A 1–2TB SSD covers most libraries.
Method 1 — Migrate Moments for Mac (Recommended)
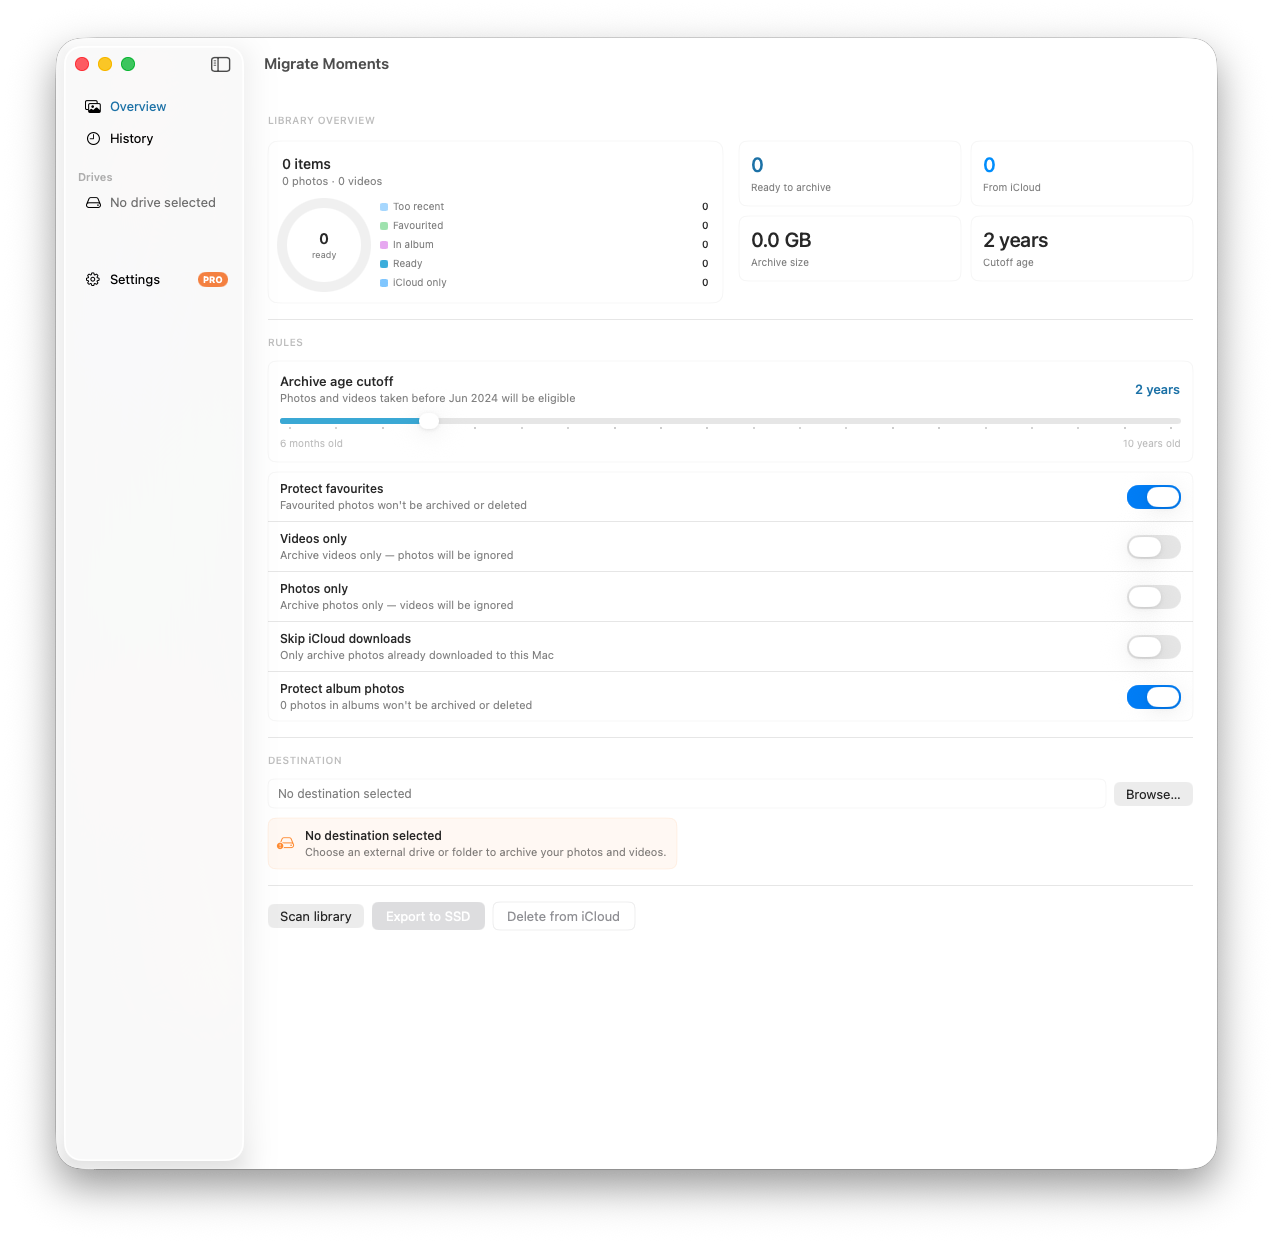
Migrate Moments is built specifically for exporting iCloud photos to an external hard drive on Mac. It downloads your originals in smart batches directly to your drive — your Mac's internal storage never fills up, and the process runs overnight without you monitoring it.
- Get Migrate Moments for Mac — free to download and scan
- Connect your external drive to your Mac
- Open Migrate Moments — it scans your iCloud Photo Library automatically
- Click Destination and select your external drive
- Click Export — it downloads and organises everything into year/month folders automatically
Photos export in their original format: HEIC stays HEIC, RAW stays RAW, videos stay at full resolution. Nothing is deleted from iCloud unless you explicitly click Delete from iCloud afterwards.
Why this beats the manual method:
- Downloads directly to the external drive — your Mac never fills up
- Handles any library size, including 100GB, 200GB, 500GB
- Resumes automatically if interrupted
- Organises into a clean year/month folder structure
- Verifies every file before any deletion
Method 2 — Apple Photos App (Manual, Small Libraries Only)
This works for libraries under 20GB where you have enough free space on your Mac.
- Open Photos on your Mac
- Go to Photos → Settings → iCloud
- Select Download Originals to this Mac and wait for the full sync — this can take hours or days
- Once synced, go to File → Export → Export Unmodified Originals
- Choose your external drive as the destination
- Click Export
The limitation: This downloads everything to your Mac's internal storage first. If your library is larger than your available disk space, the sync will stall or fail. You'll see the "Downloading" indicator in Photos for hours before you can start the export — and then you need enough room for everything twice (once on your Mac, once on the drive).
Method 3 — Apple's Data & Privacy Export
For a full archive you don't need immediately:
- Go to privacy.apple.com
- Sign in with your Apple ID
- Click Request a copy of your data → iCloud Photos
- Apple emails a download link within a few days
This is reliable but slow — the link arrives 2–7 days later, split into multiple ZIP files. Not practical if you want to start a migration today.
What Happens After You Export?
Once your photos are on the external drive:
Option 1 — Keep both. iCloud and external drive as a redundant backup. Safe, but you continue paying for iCloud storage.
Option 2 — Delete from iCloud. Remove the exported photos from iCloud and downgrade your storage plan. This is where the savings are — most people can drop from the 200GB plan ($4.49/month) to free after a proper export.
Before deleting from iCloud, read our guide on how to free up iCloud storage without losing photos to make sure nothing slips through.
How Long Does the Export Take?
| Library Size | Migrate Moments | Photos App Manual |
|---|---|---|
| 10GB | 1–2 hours | 3–6 hours |
| 50GB | 4–8 hours | Not practical |
| 100GB+ | 8–20 hours | Not practical |
The main bottleneck is your internet download speed and how many photos are already cached locally on your Mac. Running the export overnight is the easiest approach for large libraries.
Get Your Photos on an External Drive Tonight
Migrate Moments for Mac is the fastest way to export your iCloud photos to an external hard drive on Mac. It handles large libraries that would overwhelm the Photos app approach — downloading directly to your drive, organised by year and month. Free to download and scan. No credit card required until you export.
Frequently Asked Questions
Does exporting lose photo quality? No. Migrate Moments and the Photos app "Export Unmodified Originals" option both preserve original files exactly. No recompression, no quality loss.
Does exporting delete photos from iCloud? No. Exporting copies your photos to the external drive. They stay in iCloud until you explicitly delete them. Migrate Moments only removes from iCloud after verifying every file is safely on the drive.
Can I export to a network drive or NAS? Yes — any volume that appears on your Mac works, including NAS devices. Export speed will be limited by your local network connection.
My Mac doesn't have enough internal storage — what do I do? Use Migrate Moments. It downloads directly to the external drive without temporarily storing files on your Mac's internal storage first.
What folder structure does the export use?
Migrate Moments organises photos into Year/Month folders (e.g. 2023/06/). The Photos app export puts everything in a flat folder unless you manually create the structure.
Can I stop and resume the export? Yes. Migrate Moments tracks export progress — if interrupted, it picks up where it left off without re-downloading completed files.
Related Articles
Ready to free up your iCloud storage?
Download Migrate Moments free — scan your library in minutes.
